TongYu Industry

how to install an interior door (from China)

panel glass wood door

Chinese-made interior wooden doors are now popular worldwide, known for their reliable quality, fair pricing, and excellent after-sales service. However, since the structure of Chinese-made doors differs from that of many other countries, various issues may arise during installation. This article will provide a detailed explanation of the installation methods for Chinese wooden doors.

3 Type of wall

Before we talk about the installation methods, we first need to know that there are three common types of wall openings. Different wall openings require different installation methods:

1: Double-sided wall

double side wall

2: Single-sided wall

one side wall

3: No wall on either side

no wall on two side

Maybe the tools you need

Now that we understand the three common wall opening structures, let’s move on to the tools we need:

Item numberTools photoFunction
01
Measuring tape — For measuring the wall opening, door leaf, and door frame
02Level — To make sure the door frame and door leaf are straight and level
03Drill / Impact drill — For drilling holes and fixing screws
04Screwdriver / Power screwdriver — For installing hinges, locks, and handles
05Hammer / Rubber mallet — For adjusting the door frame and fixing wooden wedges
06Wooden wedges — For adjusting and fixing the door frame
07Saw (hand saw or electric saw) — For cutting the door frame or door leaf when needed
08Utility knife — For trimming details or cutting sealing strips
09Pencil / Marker — For marking installation positions
10Nails / Screws / Expansion screws — For fixing the door frame and hardware
11Glue / Foam — For filling and securing gaps in the door frame to improve stability
12Sandpaper — For smoothing rough edges during installation
13Miter saw — For precise 45° or other angle cuts, often used for door frames and trims

Of course, not all 13 tools are always necessary. This is just a detailed list to help with preparation, and some steps can be skipped if not required

Now that we are fully prepared and have a basic understanding of the wall, we can start installing the door.

Installation for walls on both sides

Measure the size of the wall opening, including the height, width, and wall thickness (of course, this should ideally be measured before you order the door).
In most cases, the height of the wall opening is not uniform. Uneven floors or differences in plaster thickness can cause the left side, right side, or middle of the opening to be higher or lower. When this happens, we need to use the smallest value, as shown in the picture below

We need to use 2405 mm as the reference for the height.

wall hole height

We need to use 865 mm as the reference for the width.

wall hole width

Now that we have the size of the wall opening and the wall thickness (let’s assume the wall thickness is 150 mm), how do Chinese suppliers calculate the size of the door leaf and the door frame?

Usually, Chinese suppliers subtract 20 mm from the wall opening height to get the door frame height, and subtract 30–40 mm from the wall opening width to get the door frame width. The wall thickness stays the same as the frame thickness.

The wall opening we measured is 2405 × 865 mm × 150 mm (wall thickness).
Height: 2405 − 20 = 2385 mm
Width: 865 − 40 = 825 mm

Now we have the door frame size: 2385 × 825 × 150 mm.

So how is the size of the door leaf calculated?

Usually, Chinese door factories make door frames with a thickness of 30–35 mm. Let’s take 35 mm as an example (as shown in the below picture). The total frame thickness is 35 mm, and the door stop is 10 mm thick, so the actual frame thickness is 25 mm.

For the width, the gap between the door leaf and the frame is usually 3 mm on each side. Therefore, the door leaf width is:
825 − -25-25-3 − 3 = 769 mm

How about the height of the door leaf? Typically, a 3 mm gap is left between the top of the door leaf and the frame, and a 7 mm gap is left between the bottom of the door leaf and the floor. So the door leaf height is:
2385 − -25-3 − 7 = 2350 mm

details of height

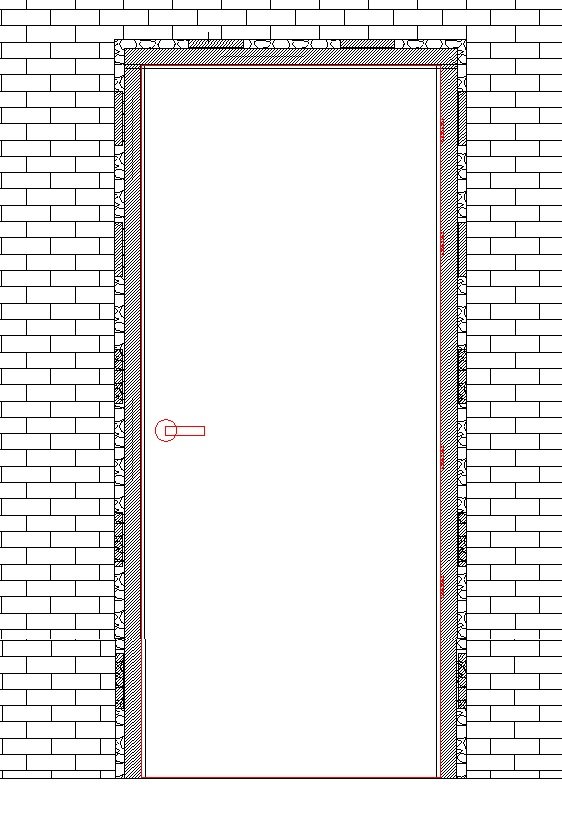
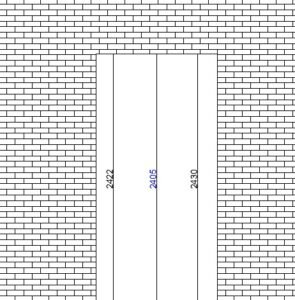
Now that we have all the sizes, you might be wondering why a 20 mm gap is left between the door frame and the wall.

This gap is used for installing the baseboard and applying expanding foam.

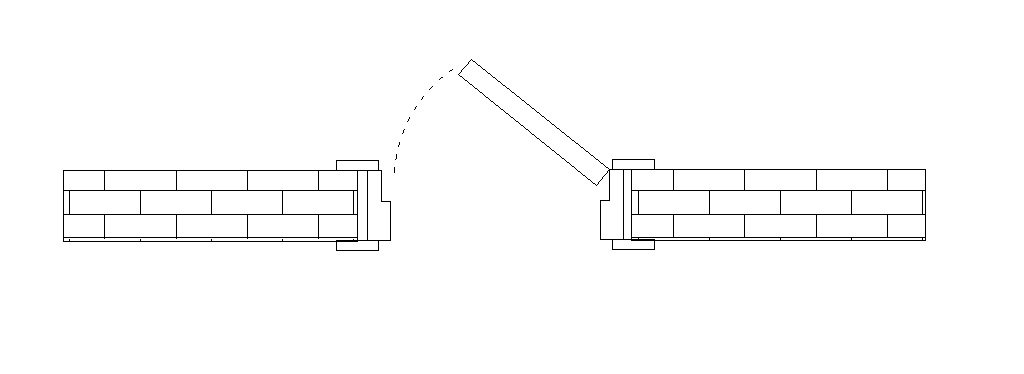
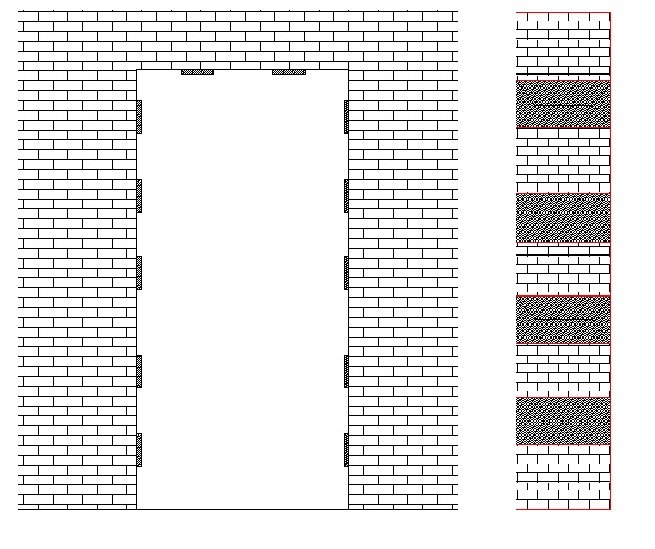
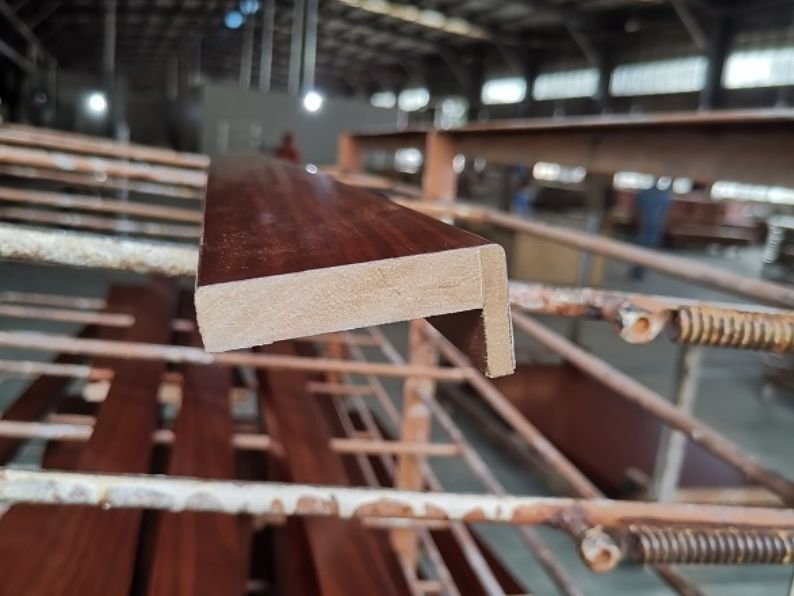
We need to cut boards that match the wall thickness. For example, if the wall is 150 mm thick, we cut boards with a width of 150 mm and a length that can vary, usually 100–150 mm. The board thickness is 10–15 mm.

We then attach these boards to the wall using a nail gun, as shown in the picture below.

base board

The advantage of doing this is that when we place the door frame into the opening, we can use a nail gun to attach it to the baseboard, making the door frame more stable.

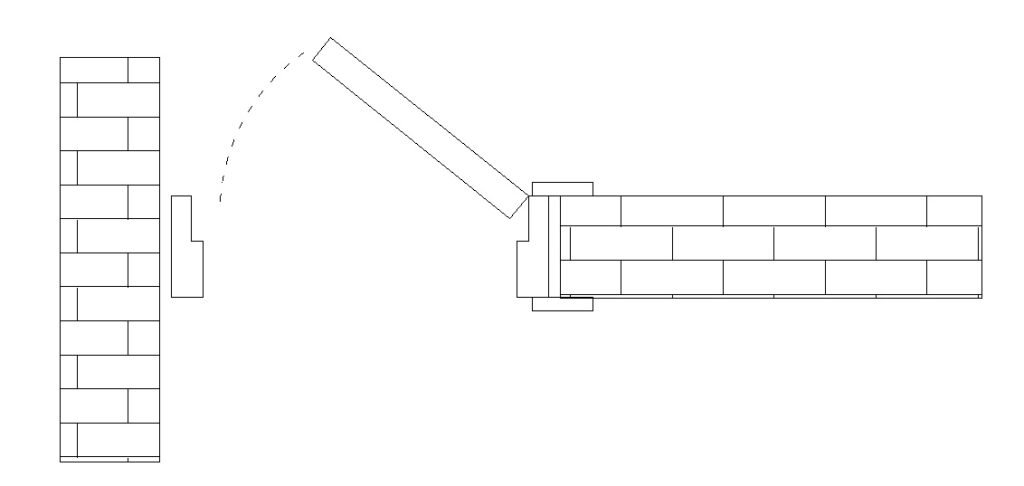
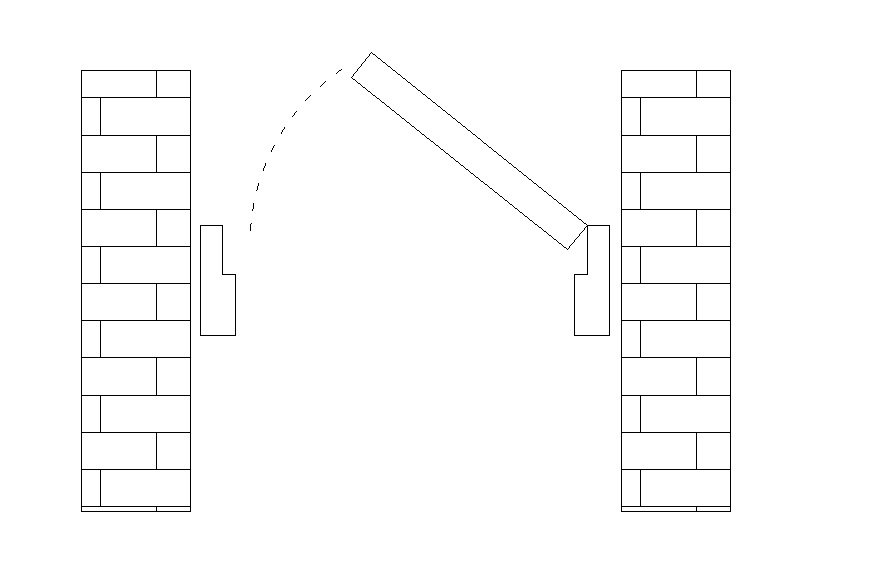
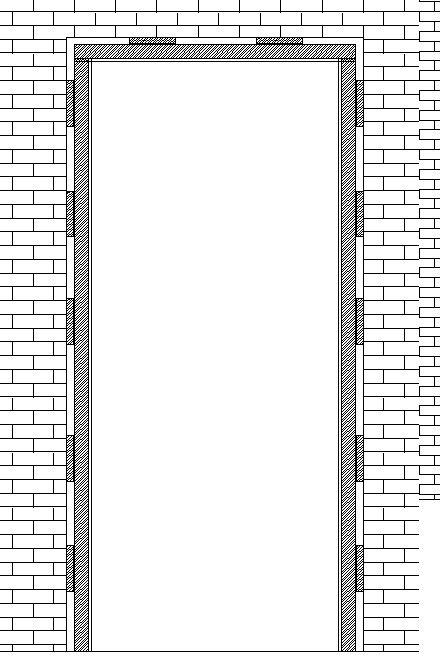
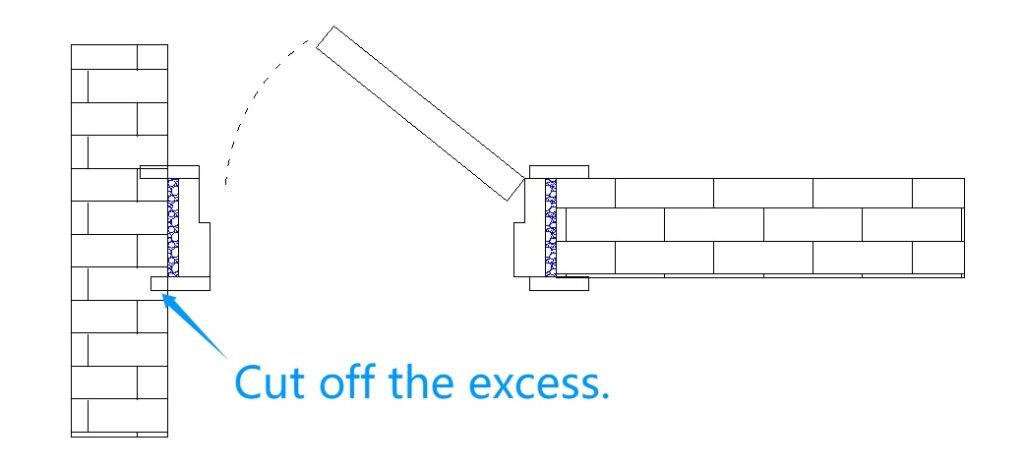
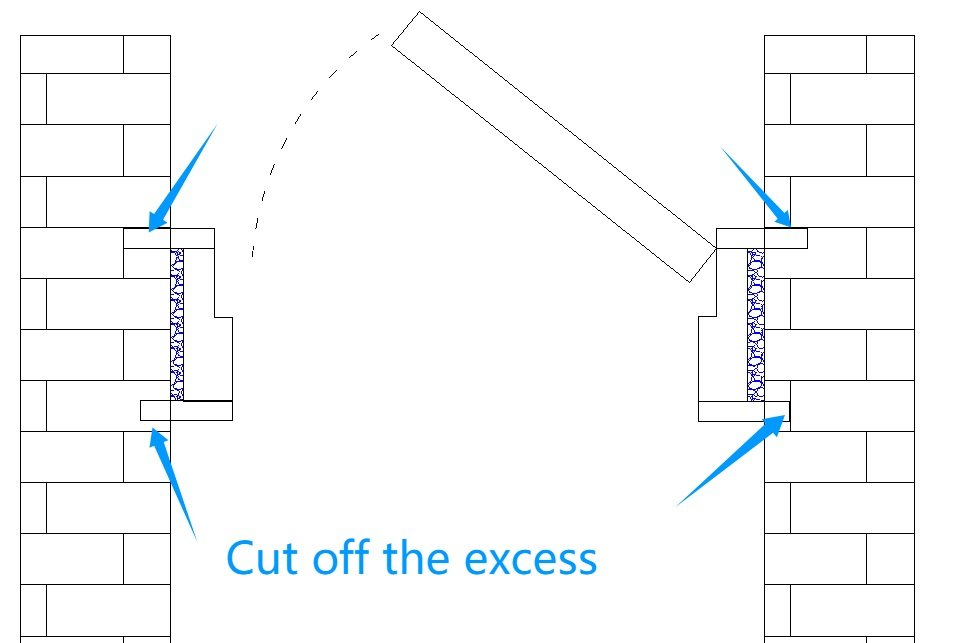
Next, we cut the door frame according to the sizes we calculated (sometimes this step can be skipped because the door frame is usually pre-cut according to the wall opening size provided by the customer, so the customer can assemble it directly). Then, we use a nail gun to assemble the top frame with the side frames and place the assembled frame into the wall opening.

base board with frame

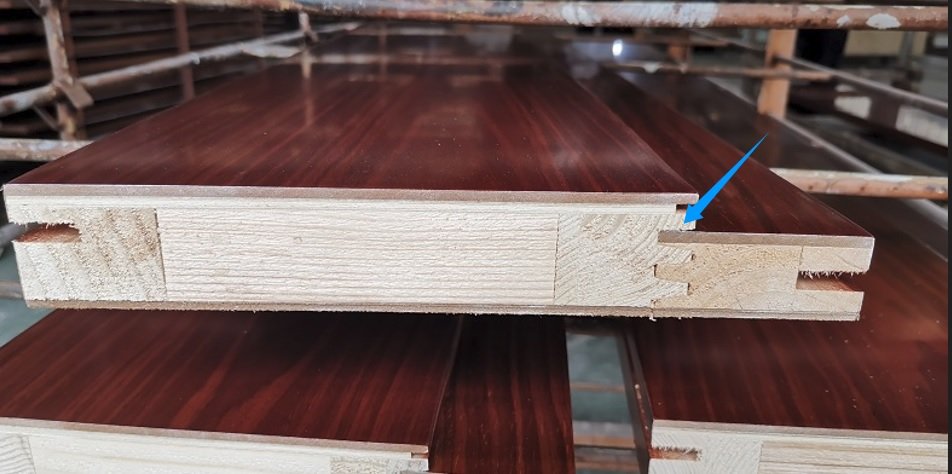
As shown in the picture, this is the position for installing the trim. We drive nails through the door frame at this position to connect it to the baseboard behind. After securing it, we put the trim back in place so that the surface remains flawless with no visible marks.

frame

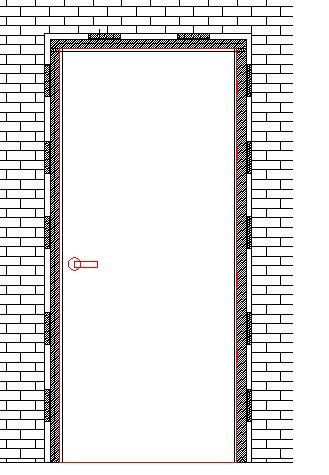
After fixing the door frame to the baseboard on the wall, I use a level to check whether the frame is vertical and horizontal. If everything is correct, we can install the door leaf onto the frame.

First, place wooden shims under the door leaf, then install the top hinge followed by the bottom hinge. After the hinges are installed, we test whether the door opens and closes smoothly. We also check the gap between the door leaf and the frame to ensure it is not too large or too small. Finally, we use a rubber mallet to adjust the frame until the result is satisfactory.

Once everything is completed, to further strengthen the wall, we fill the gaps between the door frame, the wall, and the baseboard with PU foam. The foam usually takes 1 to 2 hours to fully set.

base board with frame with pu form with hinge and lock

Usually, during production, we have already cut the lock hole on the door leaf according to the confirmed lock. At this stage, we only need to install the lock on the door leaf and then use tools to cut the latch hole on the door frame. (We usually do not pre-cut the latch hole on the frame because even a small measurement error during installation can prevent the lock from aligning properly.)

Once everything is completed, to further strengthen the wall, we fill the gaps between the door frame, the wall, and the baseboard with PU foam. The foam usually takes 1 to 2 hours to fully harden.

Final step

The final step is to insert the cut trim into the door frame. With this, the door installation is basically complete.

wood line
Final step

Installation for walls on single sides

one side wall

Single-side wall wooden door installation follows basically the same steps as double-side wall wooden door installation.

The difference is in the final step: after we inject the foam, the exposed wall surface that cannot be covered with trim is usually finished by cutting the trim to fit, as shown in the picture below.

cut off the excess

Installation for No wall on either side

no wall on two side

The installation for this type of wall is the same as the single-side wall method above. After injecting the foam, you only need to cut the trim to the required width and install it.

cut off the excess line

We will launch the English version as soon as possible. Thank you for your understanding.

Conclusion

If you don’t know how to calculate the sizes, you can leave this work to us. You only need to provide the following information, and we can calculate all the sizes and estimate the cost for you:

  • wall hole width
  • wall hole height
  • wall thickness
  • design
  • color
  • quantity

Get A Free Quote

Send Your Inquiry Today