Introduction
Chinese-made interior wooden doors have gained global popularity due to their reliable quality, reasonable pricing, and excellent after-sales service. However, their structural design differs from doors made in other countries, which often leads to installation challenges for users unfamiliar with their characteristics. This guide provides step-by-step instructions, key tips, and size calculation methods tailored to Chinese wooden doors, helping you complete the installation smoothly.
1. Pre-Installation Preparation
1.1 Understand Door & Wall Types
- Door Type: This guide focuses on panel glass wooden doors (the most common Chinese-made interior wooden door type).
- Wall Opening Types: 3 main structures that determine installation details:
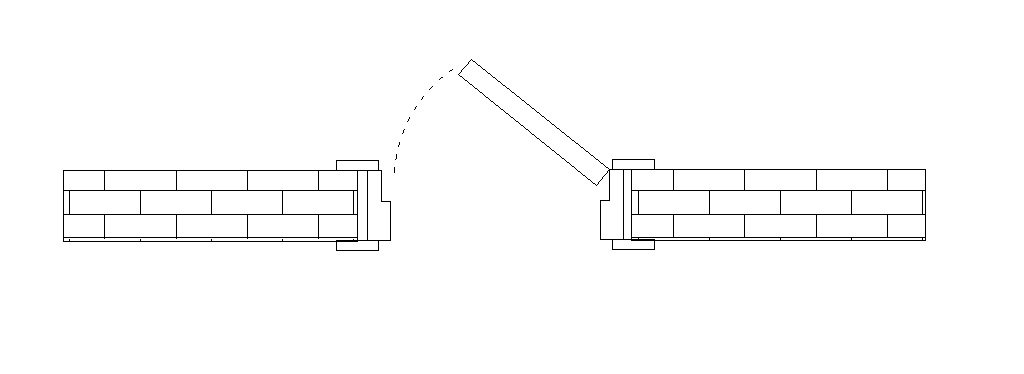
- Double-sided wall: With walls on both sides of the opening.
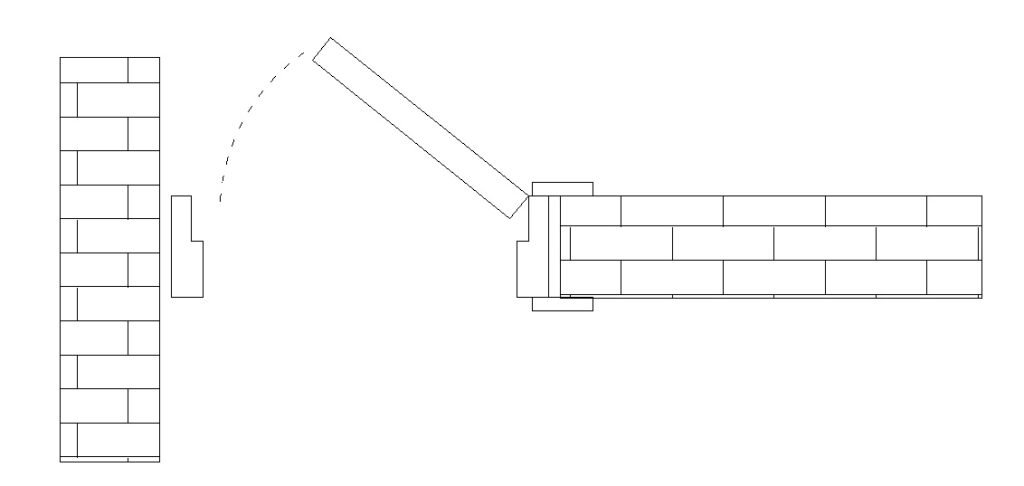
- Single-sided wall: With a wall on only one side.
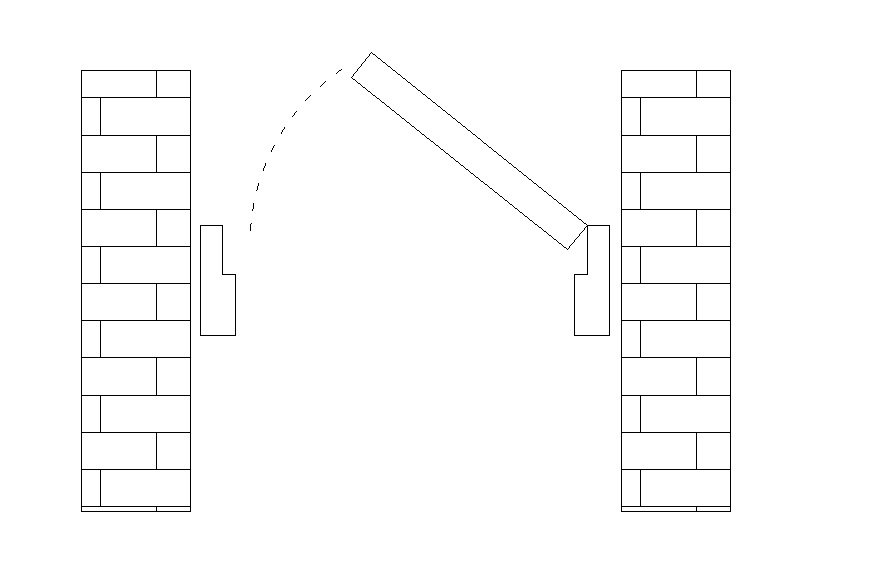
- No wall on either side: Openings with no surrounding walls.
Double-sided wall
Single-sided wall
No wall on either side
1.2 Essential Tools (Core + Optional)
| Tool Category | Items | Key Functions |
|---|---|---|
| Core Tools | Measuring tape, Level, Drill / Impact drill, Screwdriver, Wooden wedges | Measure dimensions, ensure level & vertical alignment, fix frames and hardware |
| Optional Tools | Hammer / Rubber mallet, Saw, Utility knife, Miter saw, Sandpaper, Glue / Foam, Nails / Screws | Trim materials, smooth edges, fill gaps, precise angle cuts |
1.3 Critical Pre-Check
1. Confirm the door frame and leaf match the pre-measured opening size (refer to Section 2 for size calculation).
2. Inspect door hardware (hinges, locks) for compatibility with Chinese door structures.
3. Clean the wall opening, remove debris, and ensure the floor is level (uneven floors affect installation accuracy).
2. Size Calculation for Chinese Wooden Doors
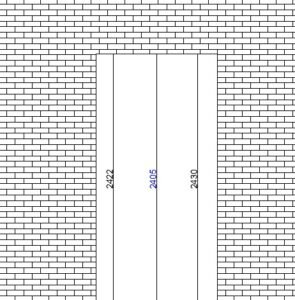
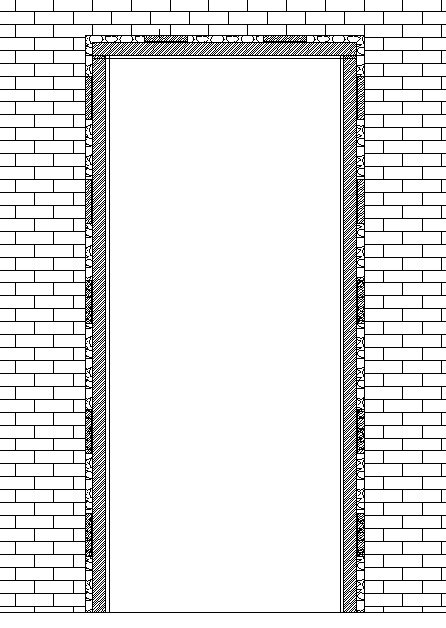
2.1 How to Measure the Wall Opening
- Height: Measure 3 points (left, right, middle) and use the smallest value (to avoid size mismatch from uneven floors/plaster).
- Width: Measure horizontally at the top, middle, and bottom, then use the smallest value.
- Wall Thickness: Measure the thickness of the wall (matches the door frame thickness).
From the picture, we can see that the height is taken as 2405 and the width as 865.
2.2 Supplier’s Size Calculation Formula
Door Frame Size:
- Height = Wall opening height – 20mm (for gap adjustment).
- Width = Wall opening width – 30–40mm (for installation clearance).
- Thickness = Wall thickness.
Door Leaf Size (based on 35mm-thick frame + 10mm door stop):
- Width = Frame width – 25mm (frame thickness) – 25mm (frame thickness) – 3mm (left gap) – 3mm (right gap).
- Height = Frame height – 25mm (frame thickness) – 3mm (top gap) – 7mm (bottom gap).
20mm Gap Purpose: Reserved between the frame and wall for baseboard installation and PU foam filling.
3. Step-by-Step Installation (By Wall Type)
3.1 Double-Sided Wall Installation
- Install Baseboard: Cut 10–15mm thick boards to match the wall thickness (100–150mm long), fix to the opening with a nail gun (enhances frame stability).
- Assemble & Fix Frame: Use pre-cut frames (or cut per calculated size), assemble top and side frames with a nail gun, place into the opening, and nail to the baseboard. Use a level to confirm vertical/horizontal alignment.
- Install Door Leaf: Place wooden shims under the leaf, install top and bottom hinges sequentially, test opening/closing smoothness, and adjust gaps (3mm on sides/top, 7mm at bottom) with a rubber mallet.
- Fill Gaps: Inject PU foam into gaps between the frame, wall, and baseboard; wait 1–2 hours for full hardening.
- Install Hardware: Fit the pre-cut lock into the door leaf, cut the latch hole on the frame (not pre-cut to avoid alignment errors), then attach trim to the frame.
1
2
3
4

3.2 Single-Sided Wall Installation
- Follow the same steps as double-sided wall installation.
- Key Difference: After injecting PU foam, cut trim to fit and cover the exposed wall surface that cannot be concealed by standard trim.
3.3 No Wall on Either Side Installation
- Mirror the single-sided wall installation process.
- Final Adjustment: Trim the excess part of the trim to the required width and install it to finish the look.
4. Pro Tips & Common Questions
4.1 Pro Installation Tips
- Prioritize pre-measured openings before ordering doors to avoid size mismatches.
- Use a miter saw for 45° angle cuts on trim/frames for a seamless fit.
- Do not overfill gaps with PU foam (it expands and may warp the frame).
4.2 What to Do If You Can’t Calculate Sizes?
Provide the following details to Chinese suppliers for professional size calculation and cost estimation:
- Wall opening width/height/thickness.
- Door design, color, and quantity.
5. Conclusion
Installing Chinese-made interior wooden doors requires focusing on structural differences, precise size calculation, and wall-type adaptation. By following the preparation steps, size formulas, and wall-specific installation processes in this guide, you can resolve common installation issues. For further support, contact your supplier with your opening dimensions and design needs.